Wood carving is an art. To have a unique style in different woodworks, you may want to do wood craving. Perfection in this particular work requires the proper tools known as wood carving tools. You need to collect different types of wood carving tools for professional finishing.
However, if you have even picked the best product, it won’t perform its best after a certain period. You need to sharpen the tools for better finishing. Now, if you didn’t work with these tools before, you may have some confusion. You can find ideas and information about different types of woodworking tools here. By the way, this article will let you know how to sharpen wood carving tools.
When to Understand If You Need to Sharpen the Tools?
Don’t you understand when to start sharpening the tools? Then you must look for finishing in woodworks. Try to draw something by engraving on the wood. If you find that even after giving enough pressure, this is not going inside the wooden piece, you need to sharpen the tools.
What Do You Need?
To start the process, you need to grab some essential tools which are –
- Belt sander and power sander
- Sharpening stones
- A good strop
- Freshwater
Step by Step Process to Sharpen Wood Carving Tools
Here are the steps that you can follow –
Step 1: Straight Up the Edges
Before you go to the main process, you need to ensure the edges have well-ending. Because a wood carving knife may have broken or rough finishing. This might not work properly during woodwork.
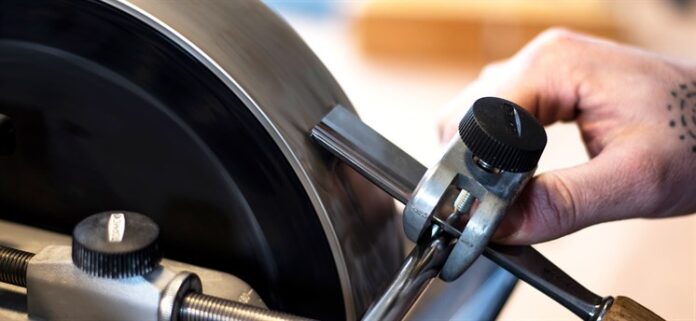
To straight up the edges and getting well finishing, take the belt sander. A belt sander is a good thing when you want smooth finishing in anything.
Now, turn on the belt sander and when it is rotating fast, get the wood carving tools and hold it to the belt. A belt sander comes with sandpaper on it. The rough surface of the belt allows getting a well-finishing on the edges of tools.
Move the tool smoothly in different directions to have the same finishing in all areas. Repeat the process for both sides. During the process, make sure that you are applying water on the tool.
If there was rust on the tool, after a few minutes, you will notice that the color is turning into clean. This means you have straightened the edges.
Step 2: Hone the Tools
If you have straightened the edges properly, now you can hone the tools. To hone the tools, you can use sharpening stones or sandpaper by attaching it to a glass surface. However, stone works better.
You can use a wide range of stones for honing. The most common types of sharpening stones are water stones, oil stones, diamond stones, and ceramic stones. Among them, water stone requires water in it and oil stone requires oil for honing. Diamond and Ceramic stones don’t require anything additionally. For your convenience, a water stone would be better.
To hone the tools, you need to place it on the stone at 11 to 19 degrees angle based on your requirement. Now move it up and down and check the tool in between the process to ensure the sharpness. Do the same process for another side and hone the tools.
Step 3: Stropping
This is the final step of sharpening your wood carving tool. For this step, take a good strop which has two sides. One should be leather and the other should be smooth. On the rough leather side, rub some layer of strop compound before using it. There is a wide range of compounds available for stropping. Choose one that best meets your necessity.
Lay down the tool on the strop and keep it a particular angle that fits it best. Set the tool from the end of the edge. Now go for slow strokes on the strop.
If you are using a good strop, it won’t require more than 15 strokes on each side. Follow the same process for each side. Finally, you will notice that each side of the tools is looking smooth and the edges are sharp enough.
Safety Tips
- Keep your fingers safe while doing the above steps
- If possible, wear a protective glove
- Don’t check the sharpness of the tools with a bare hand
- Use only good quality equipment to avoid ruining the tools
Conclusion
We think it will be no longer difficult for you to sharpen wood carving tools after reading this article. Just follow the steps as described above, and you will surely notice the change in the performance of the tools. We suggest following the user manual before starting the sharpening process.


