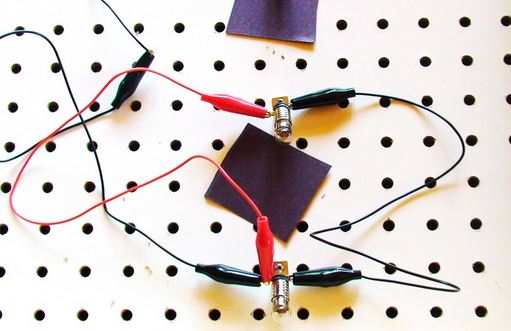
The majority of the children find electronics interesting, and that is why they have seen showing interest in circuit boards and other simple electronics. Some kids can have electronics as their hobbies because electronics seem interesting to them. Creating circuit boards can be one of the most interesting activities for kids. However, kids need to do such activities under their parent’s guidance. Parents can guide their kids on creating a circuit board. Some of the most effective tips that can help parents teach creating circuit boards for kids are listed below.
Circuit diagrams can help
The first and the most effective tip that can help parents teach their children to create circuit boards is that you should show circuit diagrams to them. Circuits are the fundamentals of electronic devices. You can start your child’s electronic education by showing a few circuit diagrams. Circuit diagrams are the pictorial representation of the way in which different components of an electronic device are connected. Circuit diagrams can help children follow a pattern for connecting different parts of an electronic device. Moreover, you should tell the various components of circuit diagrams, such as parallel lines used to represent a battery, zigzag lines used to show resistors, and triangles used to represent LED lights. Creating circuit diagrams can help children create circuit boards.
Tell them about electronic concepts
Teaching kids about the fundamentals of electronics help them in making circuit boards and other fun projects. It would be best if you told your child about the electronic terms, such as voltage and electric current. The more kids are into electronics, the more they can learn to make circuit boards in the most interesting ways.
Creating a simple circuit board for kids
Creating a circuit board can be quite interesting and fun activity for the kids. Parents can use the below-mentioned points to guide their kids about making circuit boards. So let us get started.
- The first point to create a circuit board is that you need to take the required measurement of the pegboard. Recommended measurement for pegboards is 12″ ” x16″” or 16″ ” x16″”.
- Collect all the necessary components to create a circuit board. Components include
- Battery receptacle
- Lamp holders
- Knife switch
- There should be sufficient space between the components on a circuit board.
- It would be best if you made holes with a drill in the pegboard to fix screw-based lamp holders.
- Fix the battery receptacle, screw-based lamp holders, and knife switch.
- Fix the screw-based bulbs on lamp holders.
- Leave sufficient space between two lamp holders so that you can attach the wires.
- Fix the positive end of the battery with the knife switch.
- Use a wire stripper to strip the end of copper wires.
- Unscrew one of the screws present on the knife switch. You can use a wire loop around the neck of the screw.
- You can strip the end of the negative lead wire and a wire loop. Fix the negative lead on the screw.
- Switch the knife switches ON so that your light bulbs are lit on your circuit board.


